Well, even though it has been very cold and almost all of the water close by is covered by a thick layer of ice, I was able to find some open water on this last monday and actually caught some fish. One of the flies that I used is one that I patterned after a jig that a gentleman was using to great success one day while I fished close by. It had a pink body and a white tail. Not too tough, I just used the materials I had on hand and used a micro jig hook (1/80th of an ounce) so it would be easy to cast with a fly rod.
Let me know what you think.
(Click Images for a larger version.)
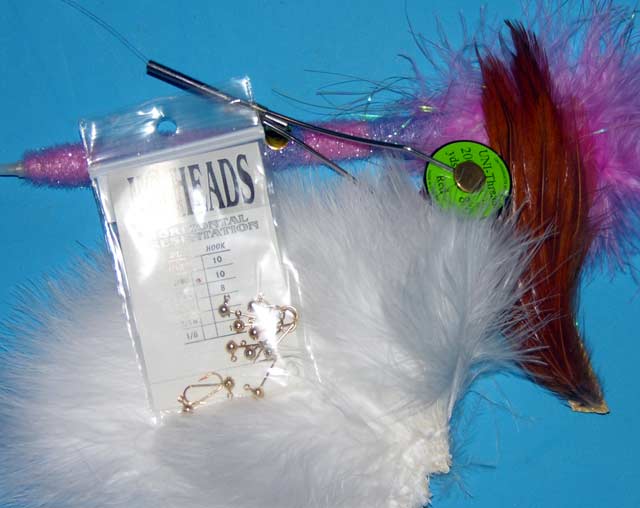
The first step is to gather the materials required for this micro jig, which are pictured above and as follows:
- Hook: Micro jig hook. (I selected a 1/80th oz hook for this.)
- Thread: Red
- Tail: White marabou
- Body: Pink sparkle chenille type material
- Front Hackle: Soft brown hackle


After gathering your materials you will need to mount the hook to be used in the vise and get the tying thread started on the hook.
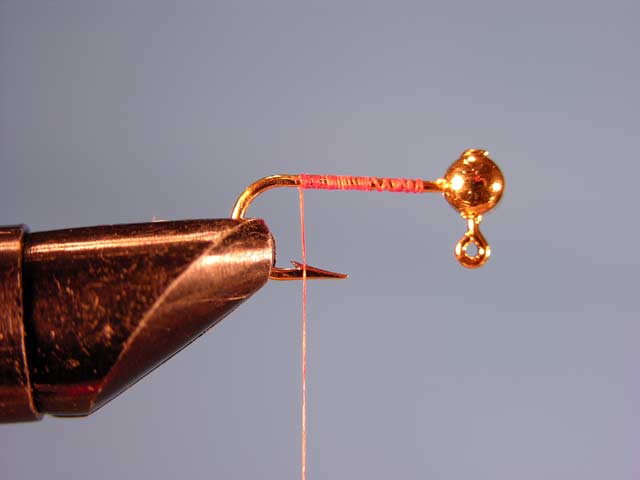
Notice that I have stopped the thread right above the barb of the hook. This is the tie in point for the tail
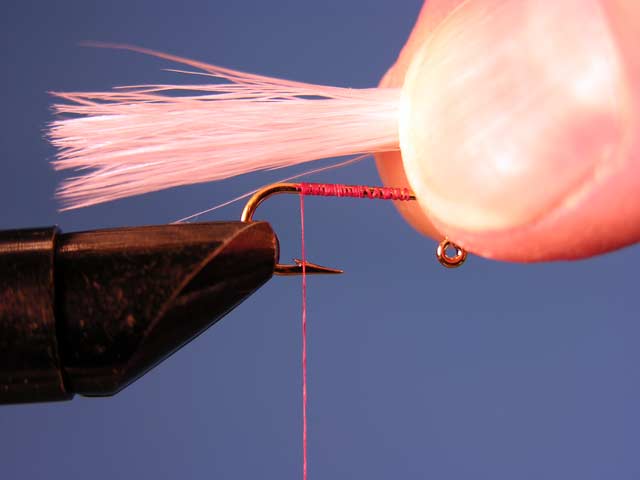
Measure the tail length so that it is approximately the same length as the hook shank.
Tie in the tail and clip off the extra material. It is good to leave some of the marabou covering the hook shank to give the body a little bulk.
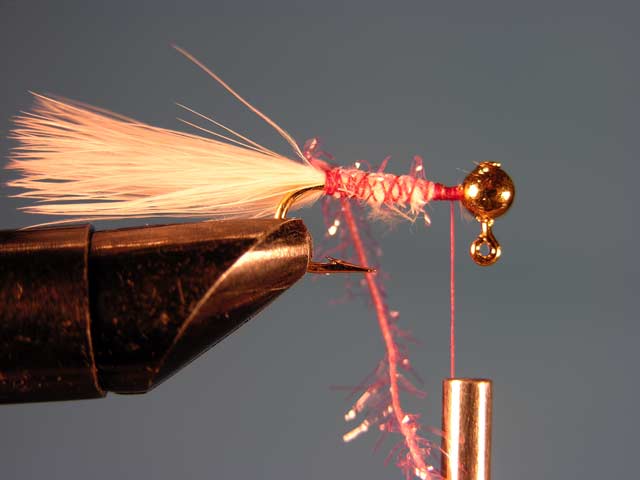
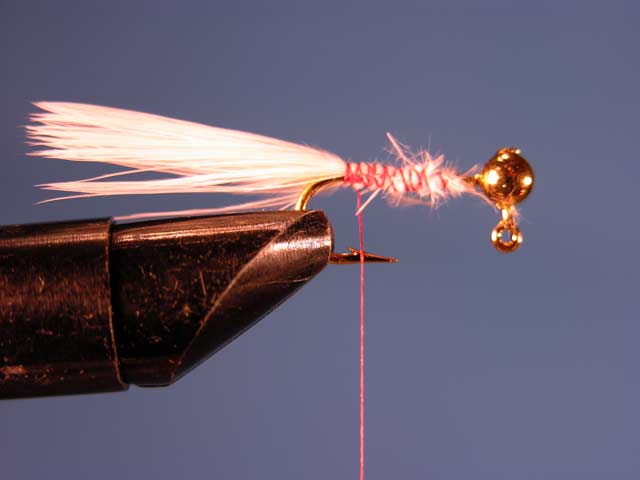
Tie in the chenille and wrap the thread up to just behind the jig head. One thing I should explain here is the body material that I am using. If you look at the materials picture, there is a pen there with this body material (as well as som purple) wrapped around it. I found this at a Scholastic Book sale a couple of years ago. When I unwind the chenille from the pen it is in great shape and ready to use. It also is very well made chenille. The center 'rope' of the chenille is woven with the sparkle bits being part of the weave, unlike some sparkle chenille I have seen where the center is just twisted string with the sparkle twisted between the fibers. This is much longer lasting.

Just behind the jig head, tie in the soft brown hackle with the concave side facing up. This will help to have the hackle sweep backwards when the fly is finished. In this image you can get a better look at the chenille material.
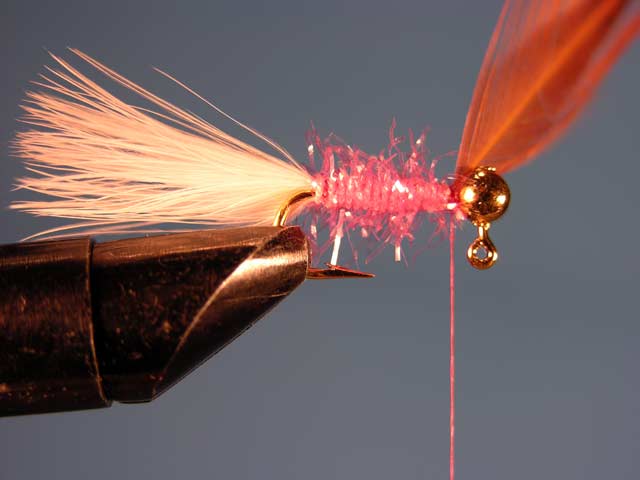
Wrap the chenille up the hook shank and tie it in just behind the jig head. Clip off the extra chenille and make a couple of extra wraps to hold it tight.
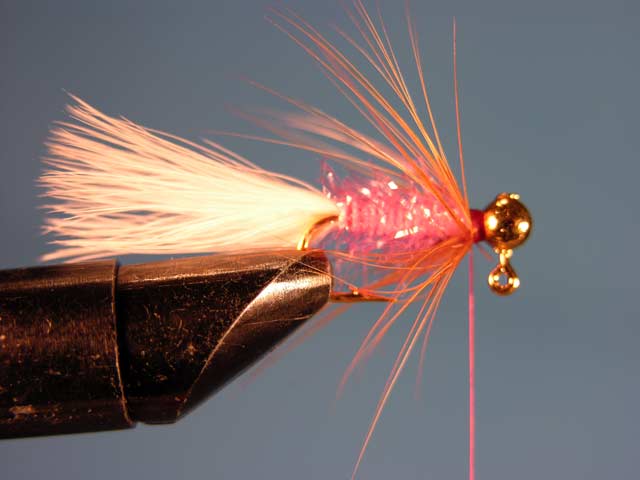
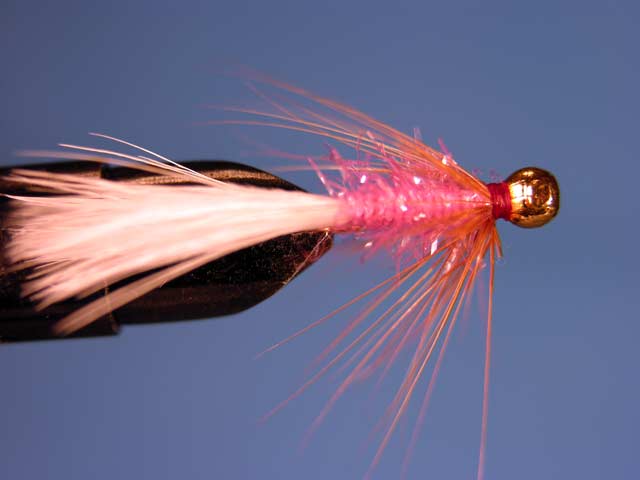
Wrap the hackle around the hook shank in two or three wraps to give a fairly thin, soft hackle that will give a lot of motion in the water as the fly moves. Tie it in and clip off the extra feather. Make a few wraps with the thread toward the back of the fly to help sweep the hackle backwards and tie off the thread with a whip finish or a couple of half hitches or however you finish your flies.
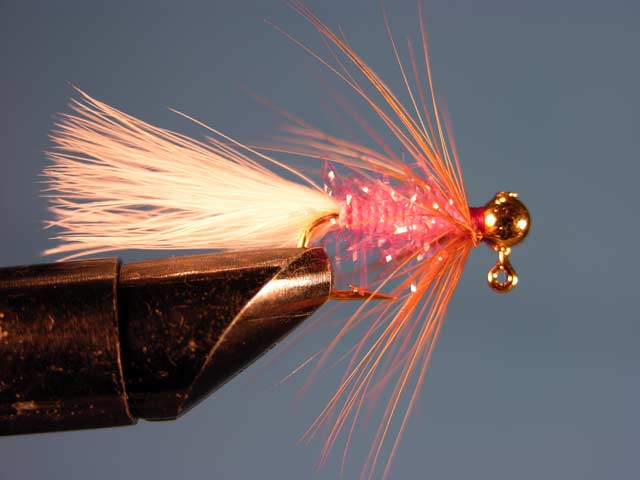
Clip off the thread and add head cement and you are finished.
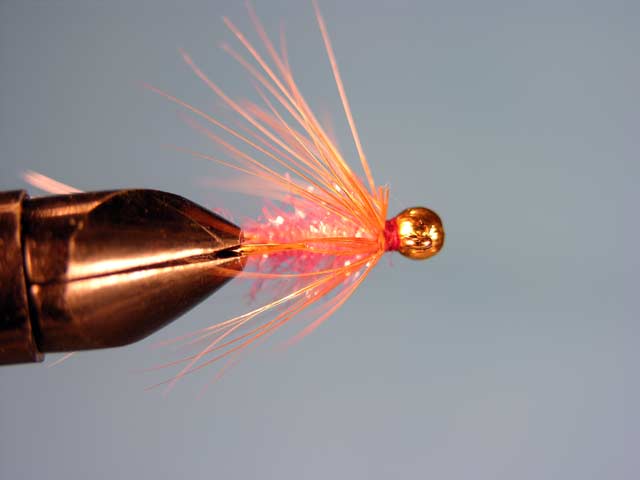
Completed Fly.
Top View.
Bottom View.
Well, now I hope the temperature rises a bit again so I can go play with my little finned friends in the water. I am really hoping that some of the ice will melt off a bit in some areas so I can just go see if anything wants to play.
Lime Trude

